How would you react if you find something which can be made with as less as 5 bucks and does the wok of an expensive storage couch? Amazed? Feeling incredulous?
Read this blog further to discover that it is a reality.
The process starts with…
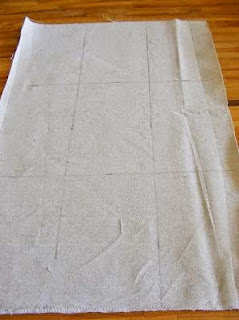
Start with a piece of sturdy fabric cut to the size you want. You can cut it from an unused drop cloth. Draw lines dividing it into equal columns and rows the size you want your pockets to be.

Read this blog further to discover that it is a reality.
The process starts with…
Start with a piece of sturdy fabric cut to the size you want. You can cut it from an unused drop cloth. Draw lines dividing it into equal columns and rows the size you want your pockets to be.

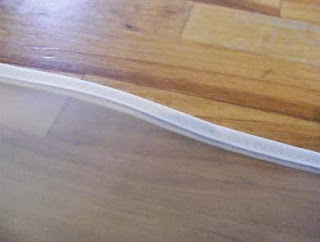
Cut some sort of plastic material into strips almost as high as your rows and about one and a half times as long. And then sew bias tape along the top edges as is shown below-

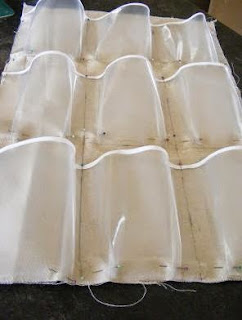
Now start pinning the plastic onto the fabric. Leave a little fold in each section preventing the pocket from staying so flat that you are not able to put things in it. (therefore the strip began longer than the fabric)

Once you have all your rows pinned in place, start sewing. Sew along the bottom of each row, and then the edges of the organizer and down the columns.Use the lines you drew at the start as a guide. Fold under the top of the organizer and sew a channel to hold a piece of dowel.

Add some loops, hang it and volia! Your DIY storage space is ready, very useful yet inexpensive!
Image Courtesy: pinterest.com